The World's Best GF Pie Crust Method—In 46 photos
Updated: Jun 12, 2024
Purchase and download the printed recipe and how-to video for $1.99 here: https://www.hawkandtigergf.com/product-page/world-s-best-gluten-free-pie-crust
Anyone who's ever made conventional pie crust from scratch knows that most gluten-free pie crusts are tricky to roll out. The process I use literally builds the flaky layers right in. Not only does it taste better than the other pie crust recipes, but it's also super versatile, and it handles like a dream come true. I've made everything from apple pie to quiche and pop tarts to Napoleons with this recipe, and it shines in every example. For best results, I recommend using Cup4Cup.
I've used the traditional pie crust method to make GF pie crusts in the past, but I've never really been happy with either the process or the results. In the Rough Puff Pastry method, cold butter is cut into the flour before a bit of cold water is incorporated, making the dough just cohesive enough to gather into a ball. Then the dough ball is rolled out and folded onto itself several times, which creates hundreds of layers. When the crust bakes, the moisture in the dough evaporates, creating an upward force that slightly lifts the layers to make it a bit lighter and crispier than conventional pie crust.
Things you will need:
Pizza cutter
Ingredients: Yield: Two 9" pie crusts
3 cups 1:1 GF flour blend (I recommend Cup4Cup)
7 g fine sea salt
355 g unsalted butter, cold
155 g cold water
Directions:
Whisk together the gluten-free flour and sea salt until they are well combined.
Put the cubed butter in the bottom of a large-capacity food processor.
Pour the flour mixture over the butter cubes.
Close the lid and pulse for 28 quick pulses.
Pour the chunky mixture into a large heavy bowl.
Evenly drizzle a thin stream of the cold water over the flour mixture while gently tossing through it with a large fork. Don't feel tempted to add more than 1 tablespoon of water.
Turn the mixture onto a lightly floured slab and gather the dough into a ball. It may seem difficult to make it all stick together, but you can do it!
Wrap the dough in waxed paper or plastic wrap and refrigerate it for 1 hour. (It is preferable to set the dough on a wire rack in the refrigerator so that the cold air can circulate evenly around the dough ball.
Lightly flour the pastry board. Remove the dough from the refrigerator, gently unwrap it and place it top side down on the pastry board. Let the dough rest at room temperature for 5 to 7 minutes before moving to the next step.
Flour your hands while over the dough ball to lightly dust it. Now, with floured hands, gently flatten the dough ball slightly. Then dust a little more flour on the dough ball.
With a non-stick rolling pin, roll dough into an 8 1/2" x 11" rectangle. Dust off excess flour from the surface of the dough rectangle with a pastry brush.
Use a dough scraper to gently loosen the dough from the pastry board, working around all 4 sides.
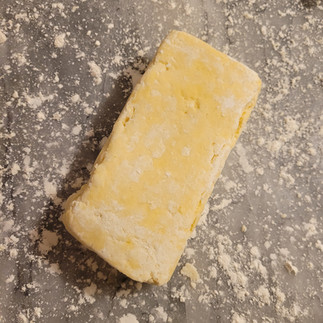
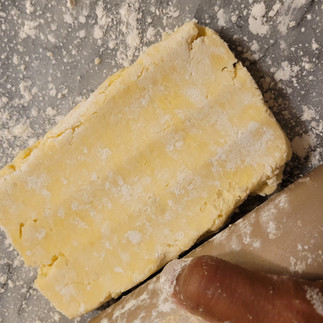
Gently fold the dough in thirds, like a letter. Make sure to brush off the excess flour between the layers. That's important if you want to see layers in your finished product. You've now completed a "turn". Now the dough block (rectangle)needs to go back in the refrigerator for 20 minutes to bring the butter it contains back down to the proper laminating temperature.
Repeat this process 4 times, chilling dough in the refrigerator as needed between turns.
Return dough to refrigerator and let chill for 1 hour, or until ready to use. For best results, shape and bake the dough within 1 to 2 days.
You should notice that the dough will get a bit smoother with each turn. See what I mean in the following pictures. In the last 4 pictures of the last set, you'll see me fold the dough in half before rolling it into a smooth ball. That step really makes it easier to roll the dough into a circle when you're ready to line your pie dish.
Now that you've made this beautiful dough, you need feel confident about rolling it out, so the next pictures are going to be pretty comforting. It's not the end of the world if you manage to tear your dough a bit. Just be creative; the texture will be worth all the effort, and I promise you'll get the hang of this!
Start with a lightly floured pastry board, and using your pie dish as a guide, draw a 1" margin around the pie plate with your finger.
Place your dough in the center of the circle you drew and dust the top of the dough ball with flour.
Roll the dough to the edges of circle, dusting the surface of the dough as needed
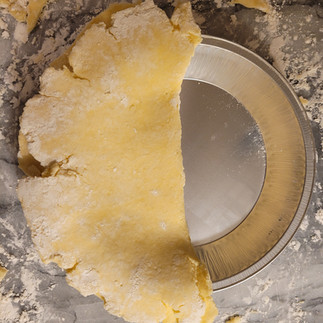
Trim the edges of the dough circle and gently fold it in half, being careful not to crease it.
Gently slide your floured hands under the ends of the folded dough circle and transfer it to the pie dish, allowing a 1" margin to hang over the edge.
Very gently unfold the dough and fit it to the pan.
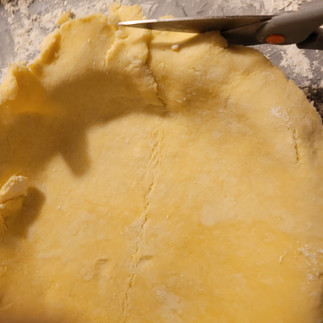
Trim any unneeded dough and crimp the crust as desired.
Apply egg wash and decorations as desired, and bake at your favorite recipe's specified temperature.

Crispy, delicious GF flakiness is possible. Give this method a try. It works!


Comments